So you have finally gotten your new Hair System. You have done all your research and tons of articles on how to select a hairpiece, how to take care of it and you have information on all of it, but now it’s time to actually put it on, and now you are thinking; How to apply it with perfection?
Well with hair systems you have two options: Glue or Tape.
Or maybe you are not new to hairpieces and usually tend to go towards Toupee Tape now you want to try a different option for an even stronger long-lasting bond. You go online and look for pros and cons of Hair system glue, and finally decide to try liquid adhesive for the hair system.

Now time for the big question- How do you use it?
Well, Lavivid has got your back. We have prepared a whole beginner's guide to the liquid adhesive. We will walk you through each step of it from application to installment along with what kind of adhesive to use for your skin type.
Before you put on your toupee you need to make sure you have the right kind of glue that fits your needs.
You can follow this guide and it will provide you with all the necessary skills to install the hair system with glue.
P.S. The attaching method for Acrylic Silicon and Water Based adhesive is different.
Items Required
Scalp Protector
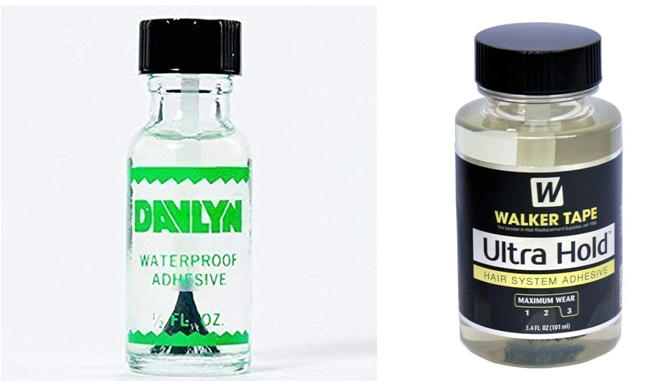
Your Choice of Glue
Applicator
Hair Brush
Preparing your Scalp
Making sure your scalp is properly cleaned and dry before you start to attach the hair system for a safe, secure bond and to make sure the hair system is properly attached.
STEP # 1: Removing Residue of Previous Application.
Firstly we should clean and get rid of all the residue left behind by the previous application, properly with a wet towel. Use a paper towel with the adhesive remover and rub the perimeter of your scalp where the hair system is to clean the area and remove all the residue.
STEP # 2: Washing your Scalp.
You will then wash your whole scalp thoroughly as the cleaner the base the stronger the hold will be. Make sure you use some sort of scrub to eliminate the signs of any oil or dirt on the scalp. To balance the pH value of your skin you are recommended to use a deep cleansing shampoo.
STEP # 3: Drying and Cleaning.
After properly washing your hair and scalp with a clean towel or use a blow dryer to remove all the excess moisture and dry it properly.
Take an alcohol-based cleanser and a cotton ball, and cleanse the scalp with alcohol to give a nice anti-septic base. Repeat 2-3 times.
STEP # 4: Locating the Hair System.
Use some makeup pencil similar to the color of your hair and draw and trace the contour of the lace of your hairpiece by making dots around the edges of the hair system. This is an essential step as your hairpiece should be positioned 4 fingers above your eyebrows.
The Hair Replacement systems have been improved so much over the decade that t is very easy to achieve natural-looking perfect hairlines. Stand in front of the mirror and find the position that suits you the best.
STEP # 5: Additional Tips.
Finally, applying a layer of waterproof sealant is highly recommended; such as a scalp protector onto your scalp. This will protect your skin as well as make the glue stick better to the perimeter of your head.

Only after you complete the Scalp Preparation, you can move towards attaching the hair system with glue.
Application of Hair System with Glue
Only after you complete the Scalp Preparation, you can move towards attaching the hair system with glue.
STEP # 1: Start by applying two very thin coats of your glue on the hairline and scalp where the hairpiece will go, wait 5 minutes between the coats. Brush down the adhesive on the dots you previously marked; use thin even coats and remember to apply in all directions, vertically and horizontally.
Wait for the glue to become tacky (not too dry or wet as well). This allows the glue to have a secure hold. If you think more glue is required, you can apply multiple thin coats waiting 5-8 minutes in between each coat but we strongly recommend you not apply more than 3 coats.
For achieving the best results with a thin skin system, use the glue on the base of the hair system as well as your scalp. Please make sure that the adhesive is completely dry before applying the second or third coat. With the lace system never apply glue to it directly, always apply it on your scalp and place the piece on top.
Step # 2: After being satisfied with the positioning of your toupee, let the glue dry and completely grasp the hairpiece for a stronghold and carefully wipe the dots you made to trace the contour of the lace.
Note: Silicone and Acrylic glue will give your hairpiece a strong 2-5 weeks of hold and the water-based adhesive provides typically 2 weeks of wear time.
Tip: While using the glue for hair system it is recommended to use a hairdryer to make sure the first coats the dried before applying second coats and to lessen the drying time.
Best Glue for Men Hair System
As you have learned everything there is to know about Glues/adhesives for hair systems- Now you need to know where to find the best Hair system glues for yourself. Lavivid has the best collection of water-based as well as solvent-based adhesives. With these glues there is no fear of the hair system sliding off or not being strongly bonded whether you are going swimming or sweating on a hot day; Lavivid Hair System Glues are perfect for you.
There is no doubt that there will be trials and errors before you find the glue that suits you best.
Visit www.lavividhair.com/accessories/hair-system-glue_40493.


Comments (0)